
Creating a custom LEGO model is an exciting process that blends creativity, engineering, and problem-solving. Whether you’re designing a LEGO mech, a movie-inspired diorama, or a completely original creation, each stage—from concept to completion—requires careful planning. In this guide, we’ll walk you through the step-by-step process of designing and building a custom LEGO model, ensuring your final creation is both structurally sound and visually stunning.
Step 1: Concept and Inspiration
How to Develop Your LEGO Model Idea:
Every great LEGO build starts with an idea. Whether drawing inspiration from movies, real-world objects, or original concepts, defining your vision is crucial before moving forward.
Research reference images and gather inspiration from LEGO sets and pop culture.
Sketch rough designs or use digital tools to establish proportions.
Define your model’s purpose—will it be for display, playability, or a complex build challenge?
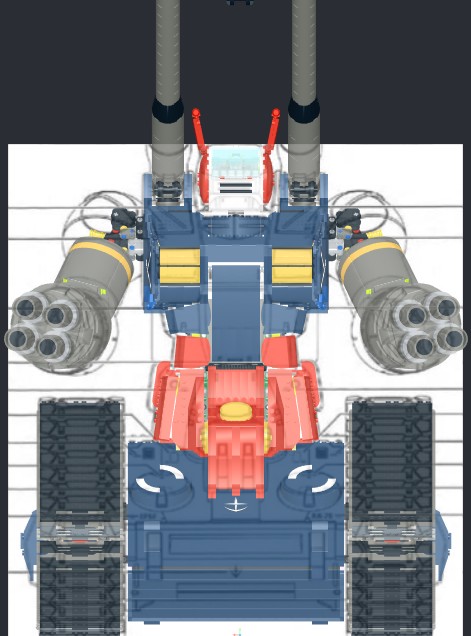
Step 2: Digital LEGO Design and Planning
Bringing Your LEGO Model to Life in Software:
Using LEGO design software like BrickLink Studio, Mecabricks, or LEGO Digital Designer (LDD) helps refine your model before committing to physical bricks.
Key Considerations for Digital LEGO Design:
Ensure structural stability by reinforcing weak points.
Check part availability and choose realistic colors.
Design with assembly in mind to make the build process smoother.
Step 3: Sourcing LEGO Bricks for Your Custom Model
Finding the Right LEGO Pieces:
Once the digital model is finalized, you need to source the necessary LEGO bricks.
Best Ways to Source LEGO Parts:
Use BrickLink or LEGO’s Pick a Brick service to buy specific pieces.
Sort through personal collections or repurpose parts from existing LEGO sets.
Consider color substitutions for rare or expensive elements.
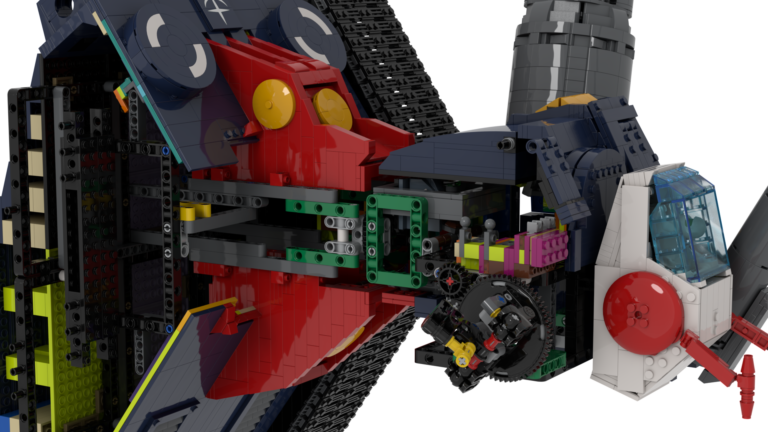
Step 4: Building and Prototyping Your LEGO Model
Testing the Physical Build:
Even well-planned digital LEGO models often require real-world adjustments.
Prototyping Tips:
Build in sections to identify and fix structural weaknesses early.
Modify design elements to enhance both stability and aesthetics.
Test articulation and moving features for durability and playability.
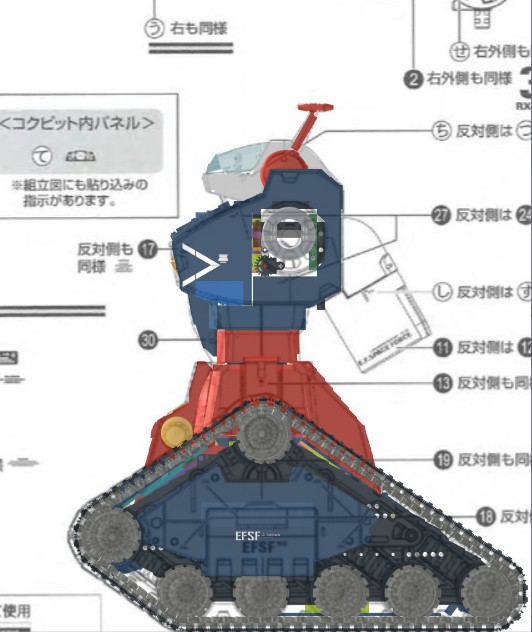
Step 5: Creating Instructions & Showcasing Your LEGO Model
Sharing Your Custom LEGO Build with the World:
Once your model is complete, you can create step-by-step building instructions and share it with the LEGO community.
How to Share Your LEGO Model:
Generate instructions using BrickLink Studio’s instruction maker.
Take high-quality photos and share your build on LEGO forums and social media.
Sell instructions or custom kits for other LEGO enthusiasts to build.
Conclusion
Designing and building a custom LEGO model is a rewarding journey that combines creativity with engineering. By following these step-by-step LEGO design tips, you can turn your LEGO ideas into reality and share them with the world.
Stay Inspired!
Want more LEGO building tips, custom model ideas, and expert advice? Stay updated for exclusive content and inspiration!